There is absolutely no doubt that homemade pizza tastes better than shop-bought ready-made pizza! At least in part because you can tailor it to your liking. But it is time consuming to make and not the sort of recipe that you are likely to want to make after a busy day.
But I tend to do quite alot of preparation for evening meals at the weekend so there is a minimum when I get home from work – so I was interested to see that you can apparently put pizza dough in the fridge – or even freeze it for later.
So after some research on the internet, I’ve been experimenting to see what works best. And many pizzas later I can now report the results of our family’s researches. (As you can imagine the children were delighted with the idea of ‘research’ into pizza!)
So what’s the conclusion?
- Keep dough in fridge:
A blog from Smitten kitchen suggests making the dough in the morning and letting it rise in the fridge all day to eat at night.
Result = this wasn’t a success for me (although I loved the look of the pizza they made). The dough didn’t rise in fridge (even though I left it 24 hours) so I had to warm it to room temperature and let it rise – not bad pizza but not quick - Freeze the dough:
Make the dough as normal, let it rise, knock back and then either
– freeze the ball of dough in a freezer bag, or
– roll out into pizza bases, separate each with a layer of baking parchment or tinfoil, wrap carefully and freeze.
Result – These work fine in that the pizza dough doesn’t seem to suffer too much from freezing. Freezing in a ball is better as the rolled out bases seem to get a little soggy as they defrost and are difficult to get off the baking paper without injury.
But, again the pizza dough needs to be warmed to room temperature before cooking which takes time and again takes this out of the category of ‘convenience food’. - Part bake the pizza bases:
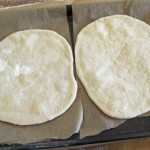
Alternatively some people recommend par baking the bases.
Make the dough as normal – let it rise and knock back. When ready roll out the pizza bases as thin as you wish them to be. Cook for 3 minutes at 220°C or higher if your oven will go higher (the kitchen units either side of mine seem to get a little warm and glowy if I put my oven much higher than this). Cool on a wire rack and freeze – again stacked between layers of baking parchment / tinfoil and wrap well before freezing.
Result – For convenience this is the one that works the best. When you need them, take them out of the freezer, cover with sauce and toppings and cook at 220°C for 10 minutes or until the crust is golden and cheese is bubbling. Now that really is convenient home-made food!
And talking of sauces, here’s the recipe for a simple sauce for your pizza.
Simple Tomato Sauce for pizza
Ingredients
- 1 small onion, chopped finely (optional – not classic pizza but I like the taste)
- 1 can chopped tomatoes
- 1 tablesp tomato puree
- 1 teaspoon dried oregano
Method
- Fry the onion in a little oil until soft and translucent
- Add the other ingredients and cook for 5-10 minutes until the sauce has thickened a little
- Spread sauce on pizza bases – put on less than you think you need – pizzas loaded with topping really do become soggy and don’t cook well.
- Add anything else you wish, mozarella, grated cheddar, shredded ham, we’ve even used up sliced camembert, goats cheese, roast peppers etc etc, and cook in the oven for about 10 mins at 220°C until cheese is bubbling and crust is golden
Enjoy!


